Advent Calendar Day 3: Exploring the Veeam Backup & Replication REST API
Advent Calendar Day 3: Exploring the Veeam Backup & Replication REST API
Disclaimer:
I’m not a professional developer, and this script was created on a beta build of the software. It is intended to demonstrate the “art of the possible” rather than serve as production-ready code. Use this example with caution, and test thoroughly in your environment before relying on it for critical tasks.
Welcome to Day 3 of our Veeam Blog Advent Calendar! We’re continuing our automation theme today, and I couldn’t be more excited to dive into one of my favorite topics: the Veeam Backup & Replication REST API.
If you’ve been managing Veeam through the GUI or PowerShell cmdlets exclusively, you’re about to discover a whole new world of automation possibilities. The REST API opens up incredible opportunities for integration, orchestration, and building custom workflows that fit exactly how you want to work.
Why the REST API Matters
Let’s face it, clicking through the GUI is great when you’re learning or doing one-off tasks. But when you need to:
- Integrate Veeam with your existing automation platforms
- Build custom monitoring dashboards
- Create workflows that span multiple systems
- Automate repetitive tasks at scale
- Integrate with CI/CD pipelines
…that’s when the REST API becomes your best friend. It’s language-agnostic, widely supported, and follows industry-standard conventions that make it easy to work with from virtually any platform.
Getting Started: Accessing Swagger
One of the best things about the Veeam REST API is that it comes with built-in interactive documentation through Swagger UI. This isn’t just documentation, it’s a full-fledged testing environment where you can explore endpoints, see request/response schemas, and even make live API calls directly from your browser.
How to Access Swagger
Accessing the Swagger documentation is straightforward:
- Open Your Browser: Navigate to your Veeam Backup & Replication server
- Access the Swagger UI: Go to
https://<your-vbr-server>:9419/api/swagger/ui/index.html - Accept the Certificate: If you’re using a self-signed certificate (common in lab environments), you’ll need to accept the security warning
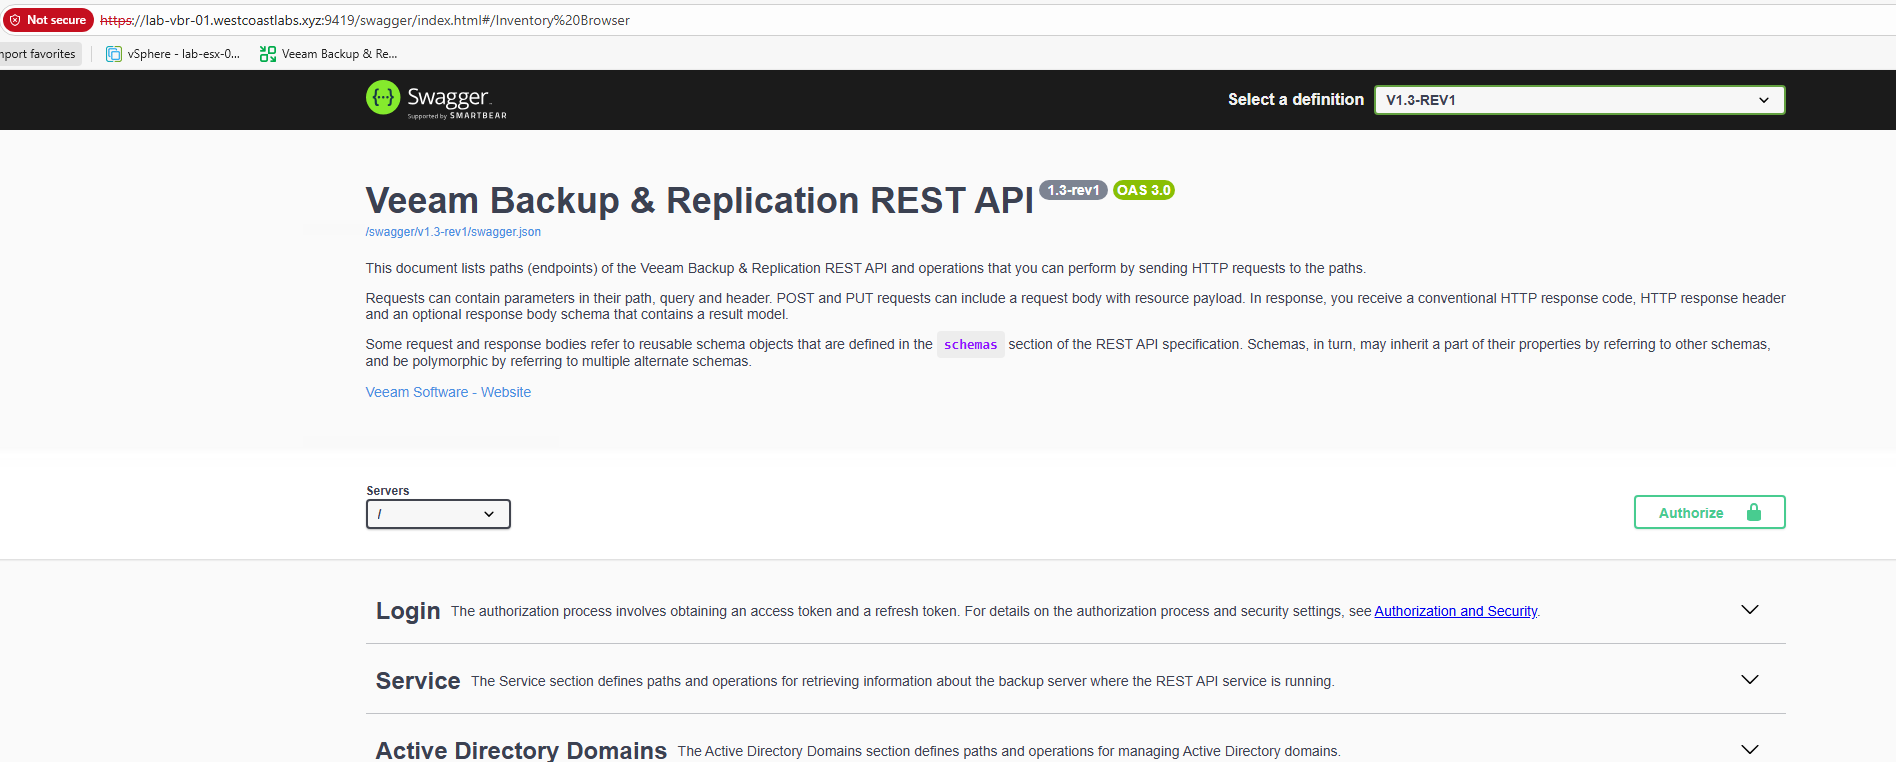
That’s it! You’re now looking at the complete API reference for your Veeam Backup & Replication server.
What You’ll Find in Swagger
The Swagger UI is organized into logical sections:
- Authentication: How to get access tokens and manage sessions
- Infrastructure: Managing backup infrastructure components
- Jobs: Creating, modifying, and running backup jobs
- Sessions: Monitoring job sessions and their status
- Repositories: Managing backup repositories
- And much more: Credentials, inventory items, reports, settings…
Each endpoint shows:
- The HTTP method (GET, POST, PUT, DELETE, etc.)
- Required and optional parameters
- Request body schemas
- Response codes and their meanings
- Example responses
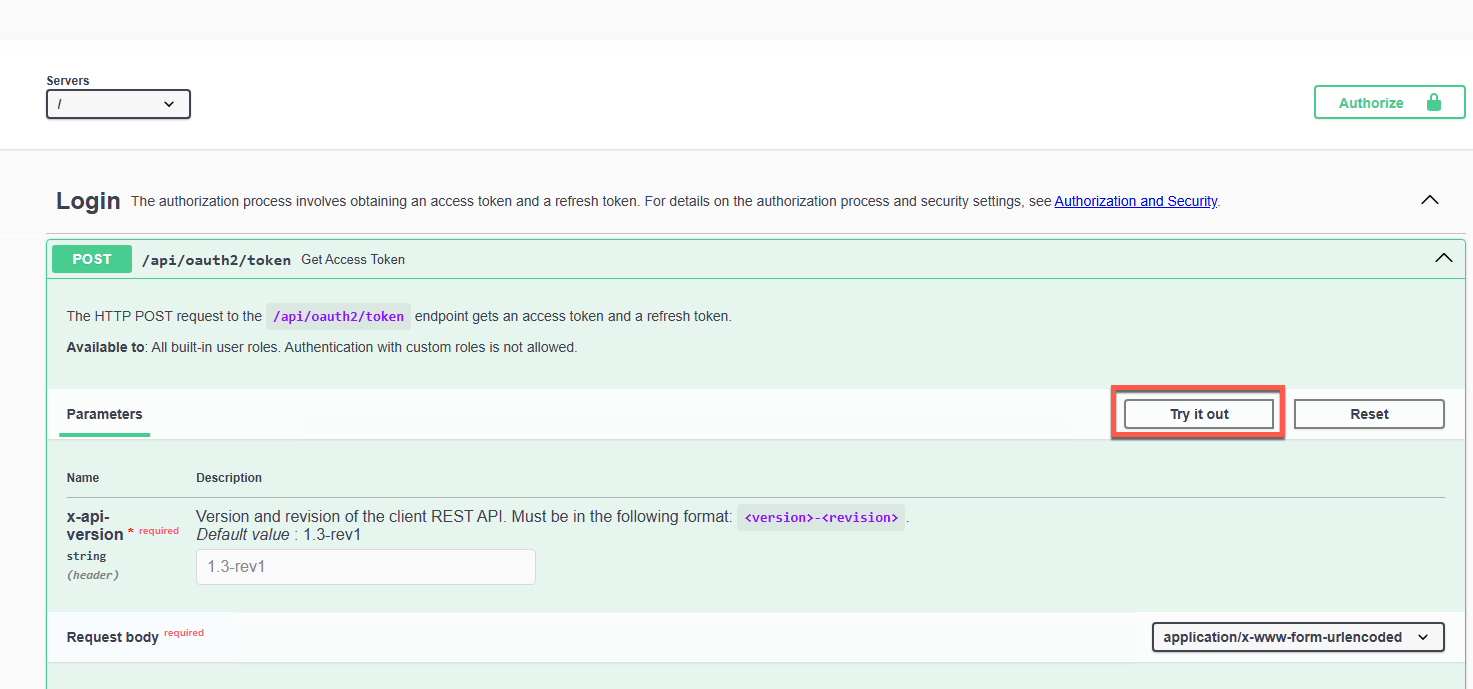
You can even click “Try it out” to make actual API calls and see real responses from your environment. It’s an invaluable tool for learning and testing!
What’s New in V13.0.1?
Veeam Backup & Replication v13.0.1 brought a massive expansion to the REST API. I’m not going to cover every single addition (you can explore them all in Swagger), but here’s a quick overview of the major improvements:
Key API Enhancements:
- User & Role Management: Complete RBAC control through the API
- Microsoft Hyper-V Support: Full backup, restore, and instant recovery capabilities
- Unstructured Data: File share and object storage backup and restore operations
- Protection Groups: Agent deployment and management for physical servers
- Enhanced Job Controls: Clone, retry, and apply configuration changes
- Mount Server Management: Configure mount servers for advanced restore scenarios
- Cloud Integration: Azure Instant Recovery and Veeam Data Cloud Vault initialization
- Global VM Exclusions: Programmatically exclude VMs from all backup jobs
- Malware Detection: Mark backups as clean and retrieve scan logs
- General Options: Email settings, notifications, event forwarding, and storage latency controls
Two Features That Really Stand Out
While all these additions are valuable, two features really caught my attention for their security and operational benefits:
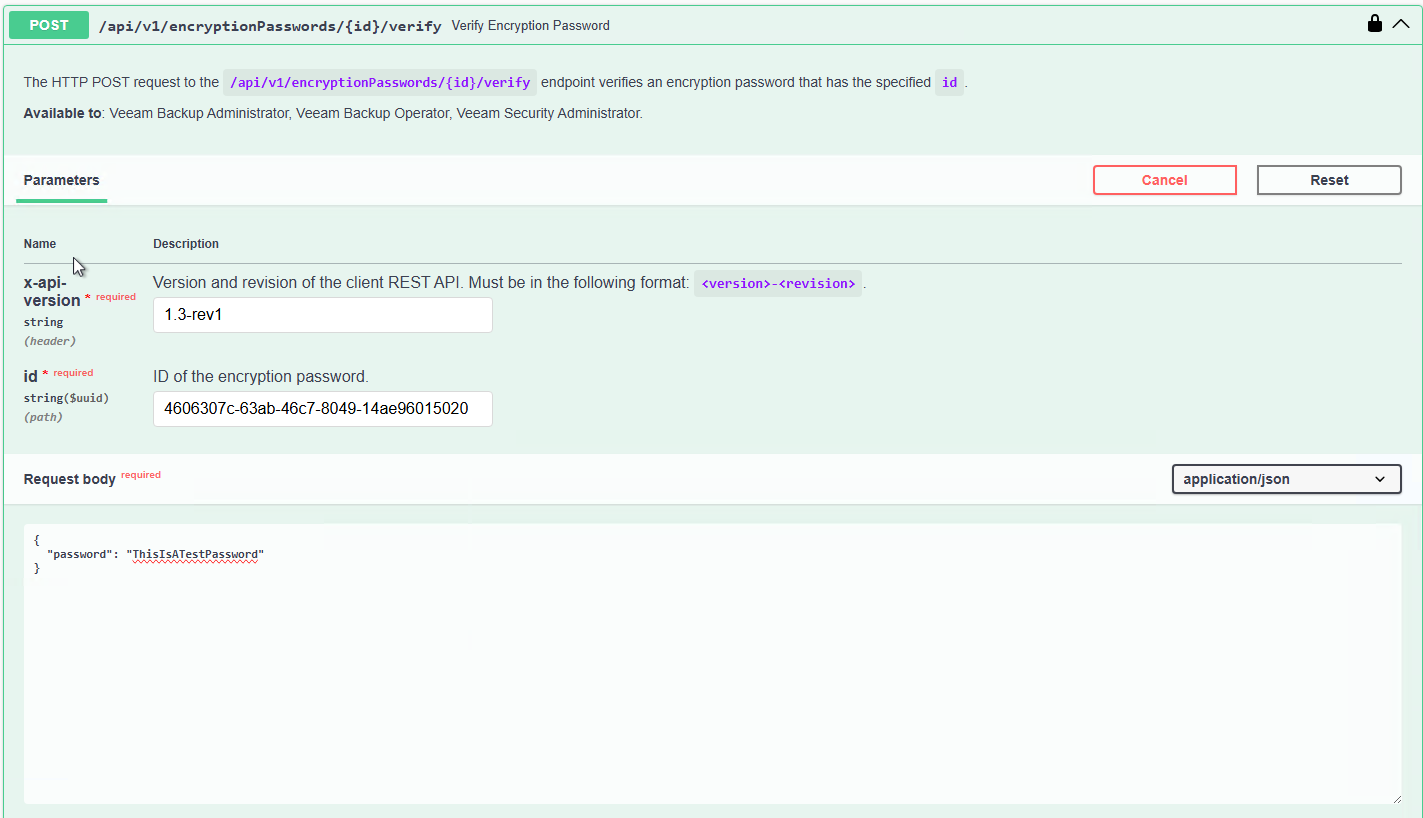
1. Encryption Password Verification
One of the most critical aspects of backup security is ensuring your encryption passwords are valid and haven’t been corrupted. The new /api/v1/encryptionPasswords/{id}/verify endpoint lets you routinely verify encryption passwords programmatically, perfect for compliance auditing and operational health checks.
Example: Verify an encryption password
# Verify that an encryption password is valid
curl -X POST "https://vbr-server:9419/api/v1/encryptionPasswords/{passwordId}/verify" \
  -H "Authorization: Bearer $TOKEN" \
  -H "x-api-version: 1.3-rev1" \
  -H "Content-Type: application/json" \
  -d '{
    "password": "YourEncryptionPassword123!"
  }'
Response:
{
  "isSuccessful": true,
  "message": "Password verification successful"
}
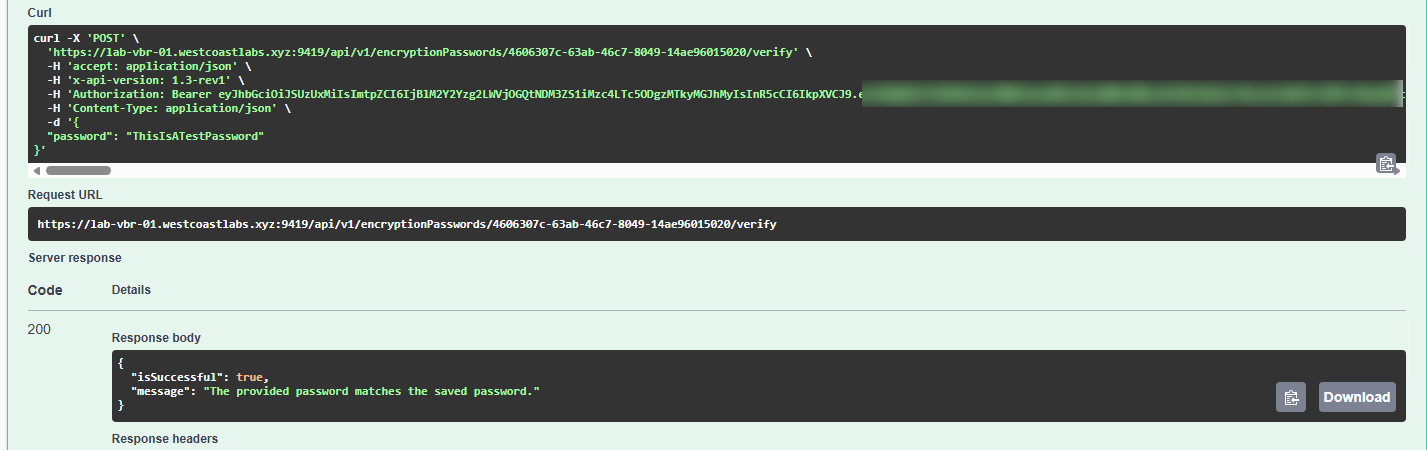
This is incredibly useful for building automated compliance checks that verify your encryption passwords on a regular schedule, ensuring you can always recover your encrypted backups when needed.
2. SureBackup Scan Session Logs
With V13’s enhanced SureBackup capabilities for malware detection, the /api/v1/malwareDetection/scanSessionLog/{id} endpoint retrieves detailed logs from SureBackup scan task sessions. This is particularly valuable when using SureBackup as an on-premise clean room for testing and verification of your backups before production restores.
Example: Get SureBackup scan logs for clean room verification
# Get detailed scan logs for a specific SureBackup task session
curl -X GET "https://vbr-server:9419/api/v1/malwareDetection/scanSessionLog/{taskSessionId}" \
  -H "Authorization: Bearer $TOKEN" \
  -H "x-api-version: 1.3-rev1"
Response:
{
  "lines": [
    "Starting SureBackup scan for backup 'Production-VM-Backup'",
    "Scanning restore point from 2025-12-03 09:00:00",
    "YARA rule match: Potential ransomware detected in file C:\\Windows\\Temp\\suspicious.exe",
    "Total files scanned: 145,892",
    "Threats detected: 1",
    "Scan completed at 2025-12-03 09:15:32"
  ]
}
This is essential for organizations using SureBackup to verify backup integrity and detect malware before performing production restores. You can integrate these logs into your SIEM or security monitoring platform to automatically capture scan results from your clean room environment, creating comprehensive audit trails for compliance and security investigations.
Understanding the API Structure
The Veeam REST API follows RESTful conventions, which means if you’ve worked with modern APIs before, you’ll feel right at home. Here’s a quick overview of how it’s structured:
Authentication
Before you can do anything, you need to authenticate. The API uses bearer token authentication:
- POST to /api/oauth2/token: Send your credentials
- Receive an access token: Valid for a specific time period
- Include the token in subsequent requests: In the Authorization header
We’ll dive deep into authentication in tomorrow’s post when we start making actual API calls!
Resource-Based Endpoints
The API is organized around resources. For example:
/api/v1/jobs- Work with backup jobs/api/v1/backupServers- Manage backup servers/api/v1/repositories- Interact with repositories/api/v1/sessions- Monitor backup sessions
Each resource typically supports standard CRUD operations:
- GET: Retrieve information
- POST: Create new resources
- PUT/PATCH: Update existing resources
- DELETE: Remove resources
Query Parameters and Filtering
Many endpoints support query parameters for filtering, sorting, and pagination:
GET /api/v1/jobs?nameFilter=SQL&orderBy=name&limit=50
This is incredibly useful when you’re working with large environments and only need specific information.
What’s Coming Next
Today we’ve laid the groundwork by exploring what the REST API is, how to access the documentation, and what’s new in V13.0.1. But we’re just getting started!
Tomorrow in Day 4, we’re going to get hands-on. I’ll show you how to authenticate, make your first API calls, and build practical scripts using both CLI tools and PowerShell. We’ll tackle real-world scenarios that you can immediately apply in your own environment.
Then in Days 5 and 6, we’ll take it to the next level by exploring N8N, a powerful workflow automation tool that lets you build complex integrations using a visual interface. Imagine connecting Veeam to Slack, email, databases, and dozens of other services without writing a single line of code!
Wrapping Up
The Veeam REST API is a powerful tool that opens up endless automation possibilities. Whether you’re building custom integrations, creating monitoring solutions, or just trying to automate repetitive tasks, the API gives you the flexibility and control you need.
Take some time today to explore the Swagger documentation on your own Veeam server. Click around, read the endpoint descriptions, and get familiar with what’s available. Tomorrow we’ll put it all into practice!
See you tomorrow for Day 4, where we’ll start making some actual API calls! 🎄